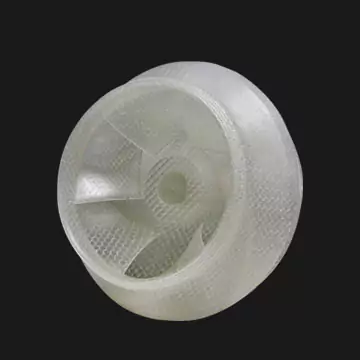
Bi-Uni Convertible SLA 3D Printing Bicycle
Model name: Bi-Uni convertible bicycle
Material: ProtoFab C101 Photo-reactive Resin
Production technique: SLA 3D printing
Lead time: 3 days
Precision: 0.01 mm
Lead time: 3 days
Client requirements: Solid construction, high-quality post-production
Project Background
We were contacted by the organizing committee of the 2017 Cross-Strait Industrial Design Awards with a request to provide professional prototype production for each of the competitors. With high-quality models produced for each of the products taking part, it would be much easier for them to show off their innovation and ingenious design.
The creators of this bicycle got in touch with us and sent us their impressive design. Their thinking was that despite technology advancing greatly over the past decades, bicycle design has hardly changed. This project sought to put that right by completely reimagining what a bicycle should look like and how it should work. The wheel design was inspired by those of a self-balancing scooter, and the bicycle can be split in two to form two separately ridable self-balancing unicycles. The ability to split into two parts also makes storage easier and greatly increases portability. Of course, it can still be ridden normally as a bicycle, but the ability to convert to self-balancing unicycles is what sets it apart from the rest.
Project Analysis
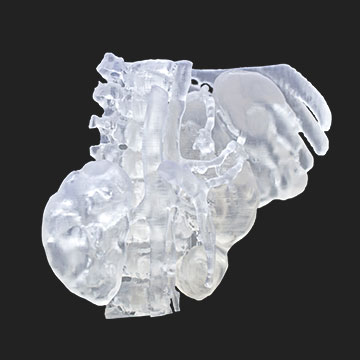
On receiving the client's drawings and requirements our design team promptly began their analysis, assessing the feasibility of the project and discussing minor adjustments to the construction. Due to the complexity of the design, it was decided that using CNC machining would result in excessive material, equipment and labor costs, as well as being too time-consuming. Due to this, our team selected SLA 3D printing as the way forward for the project. Not only would this be significantly quicker than CNC, it would also make post-processing more straightforward. Below is the drawing the client sent us.


Breakdown and Analysis
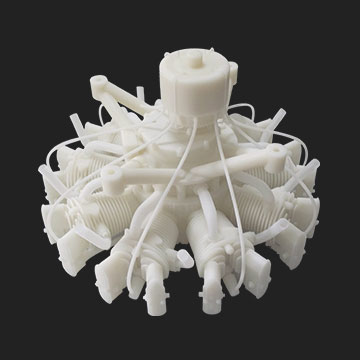
Because we decided to go with 3D printing for the production of the model, it was necessary to undertake a complete breakdown of the design and a full analysis of how each of the parts related to each other. If there was a minor issue with even the smallest of parts, the whole design could be jeopardized
Strict Finishing Requirements
High-quality polishing, painting and gluing were all critical to the success or otherwise of the design. Polishing and painting, in particular, was unusually complex, requiring multiple stages in order to achieve the desired effect.
Awkward Assembly
Due to this model containing a very high number of small parts, assembly was a real headache. Making sure the finished assembly was strong was our top priority.
Solutions


Analysis
With such a complex design involving so many small parts, prior to printing it was necessary to divide the model up into sections which would be printed separately and then later assembled. Using software, we were able to optimize the assembly process and check for any potential issues with the design. The images above show the results of our computer analysis with the model divided into different sections, each signified by a different color.
Precision Finishing
Sanding
Although SLA 3D printed parts are extremely high quality, it should be noted that there will still be minor ridges and imperfections when the model is first removed from the printer. However, this can be effectively dealt with by polishing with sand paper. Before this, it is necessary to wash the parts in alcohol and remove the support structures that were needed during printing. The sanding starts off using coarse sandpaper and progressively gets more fine (400 to 1500) until the parts are smooth. Due to the design having a high number of small parts, we decided it was best to use manual polishing.
Undercoat
After the sanding was finished we had to use our advanced painting equipment to quickly apply an undercoat of paint to each of the parts. This is an extremely demanding task as it is necessary to constantly adjust the pressure of the spray paint, ensure the paint is applied accurately, and at the same time make sure the task is completed at high speed. The key is the hand movement, a single movement of 30cm without stopping or slowing down. If the movement isn't constant, the paint will be applied unevenly. We first applied the undercoat so we can better check for defects before the color is fully added. Every detail must be exactly as required in order to pass the inspection. After this first coat is applied, the parts are left to sit for a while to let the paint dry. The next stage is another round of polishing, this time more delicate and detailed.
Top Coat
After the polishing is done it's time for another wash to prepare for the top coat of paint. Each individual part is painted carefully according to the client's specifications.
Assembly


Printing the model in sections means that assembly is required at the end. With so many small parts, the number of places requiring gluing is numerous, once again challenging our experienced team. We use specialist glue to affix each and every part solidly and precisely to the correct position. It takes a little while to square up each location and make sure the part is stuck firmly, and since this is the final step of the process it's absolutely essential to get everything spot on.
Perfect Detailing


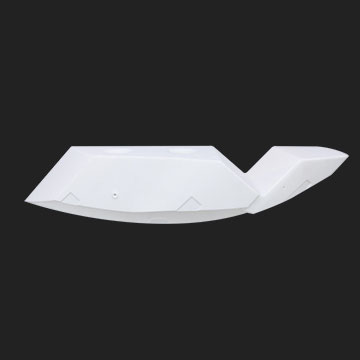
At this stage, we were ready to seal the model into its packaging and send it to the client. The client was very satisfied with the finished result and was impressed by the standard of our 3D printing. From start to finish the project lasted 3 days, and throughout we did everything we could to minimize costs for the client while maintaining our high standards. The printed model met all of our client's expectations, from the precision of the details to the quality of the finishing.


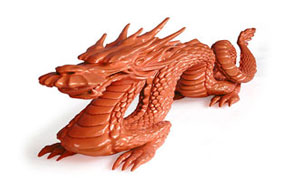
Finished model
As 3D printing becomes more sophisticated, material science is also advancing in step and the number of possibilities keeps growing. If you'd like to learn more about the 3D printing solutions offered by ProtoFab and how they can be applied to different industries, or you have a project similar to the one described here, don't hesitate to get in touch!


 中文
中文 English
 日本語
日本語 한국어
한국어 Français
 Deutsch
 Italiano
 Pусский
 Português
 Türkçe
 हिंदी
हिंदी Norsk
Norsk